Create clips
If you need to edit your uploaded video from the media library, you can use the Video clipper and cut the video into shorter clips by clicking on the scissors icon.

CLIPPER INTERFACE
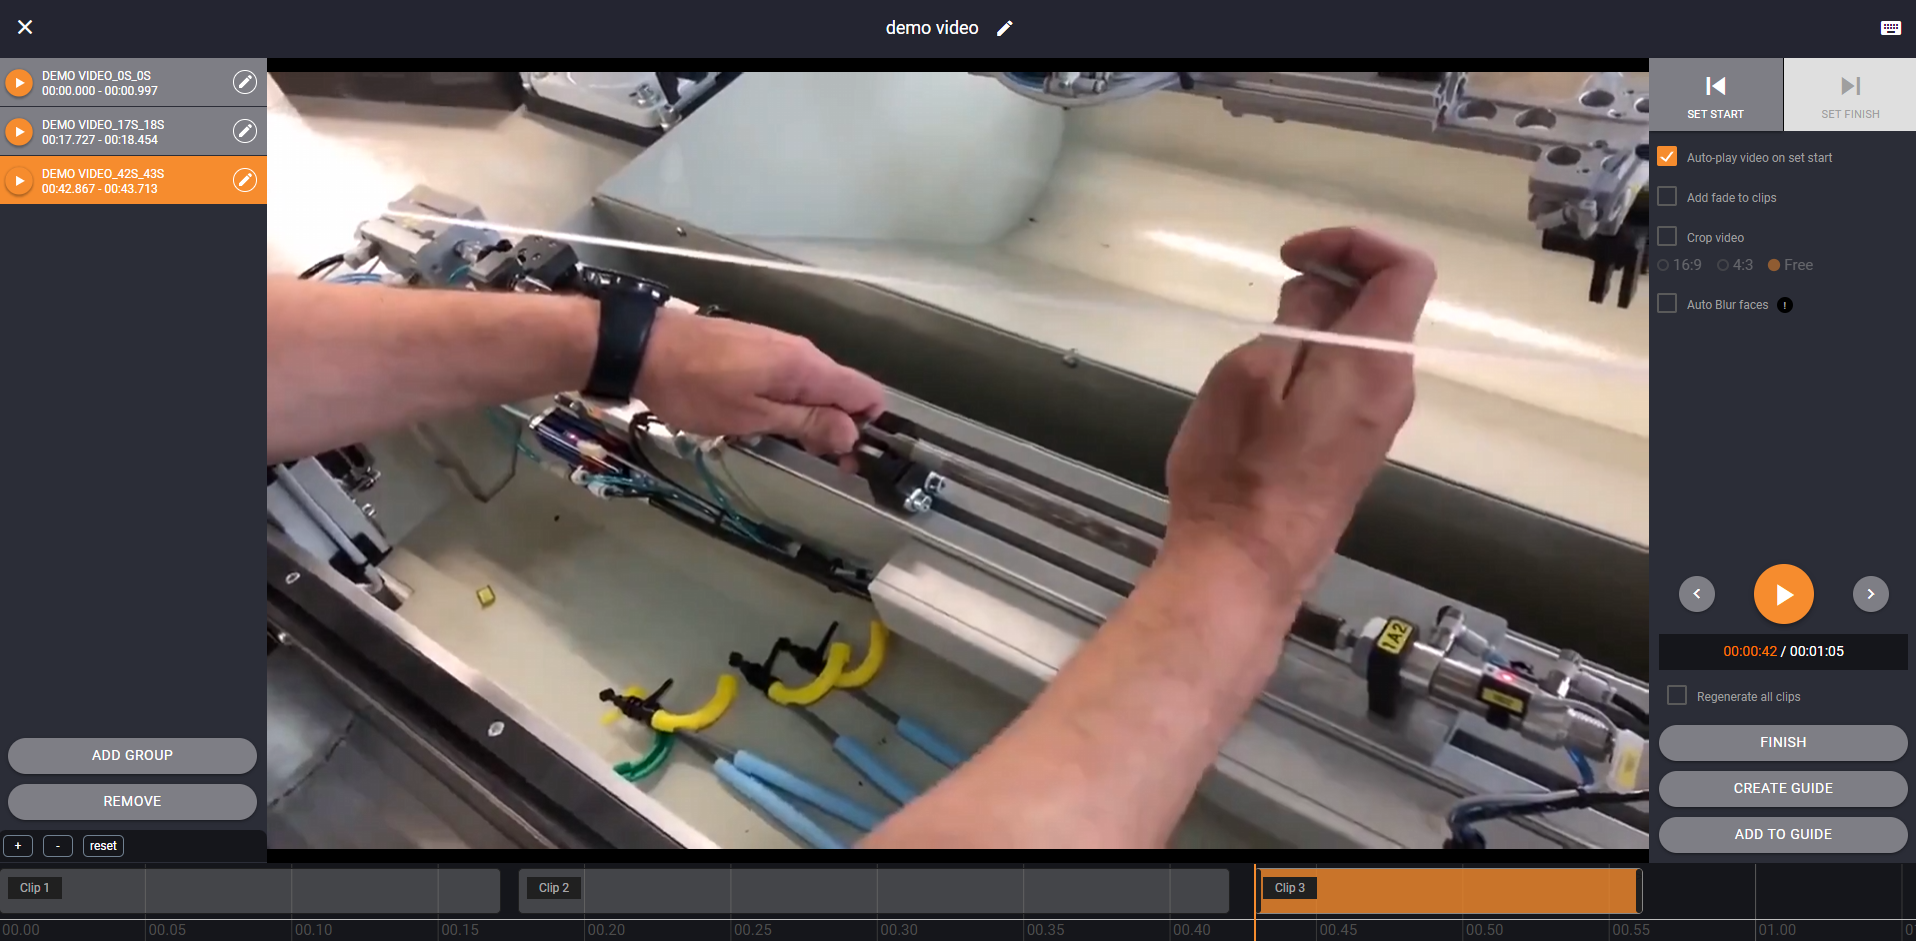
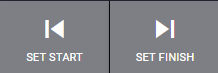
In the clipper, you can create short video clips by clicking on “Set start” and “Set finish” buttons to define a clip. The created clip will appear on the left menu as well as on the timeline.
Select the Auto-play on or off when creating the clip. If on, when clicking on SET START, the video will automatically play. If this option is disabled, the video will not start playing.
![]()
You can also add a fade-in and fade-out at the beginning/end of each clip by selecting the option "Add fade to clips".
![]()
From the left menu, you can:
- play a clip from start to end by clicking on a Play icon.
- edit the clip by clicking on the Pencil icon.
![]()
FINISH CLIPPING VIDEO
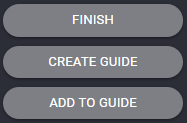
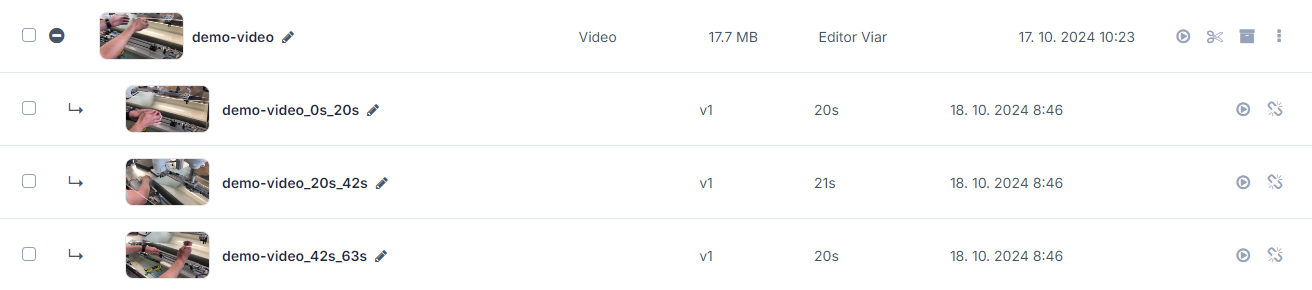
When you're happy with the clips, click on the button "FINISH" at the bottom right corner, and you will be redirected back to the media library with your clips attached under the original video.
To see the list of clips simply click on the + button next to your original video and the clips will expand. To detach the video clip, click on the button “Detach”. The detached video will be placed in the same folder as the original video.
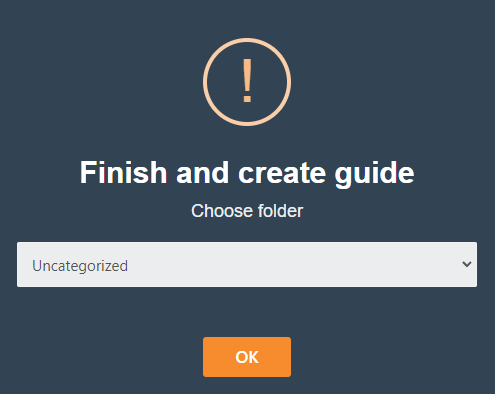
Or click on the button "CREATE GUIDE" to immediately create a guide from the created clips.
Upon clicking the latter button, you will be asked to choose a folder in which you would like to save your new guide.
You can also add the clips to existing unapproved guides by clicking on the "ADD TO GUIDE".
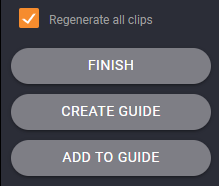
REGENERATE ALL CLIPS
If you, later on, decide to enable or disable options such as a fade to clips, crop video, or Auto Blur faces, in existing clips, you can do that by enabling the checkbox "Regenerate all clips":